Lens Anatomy
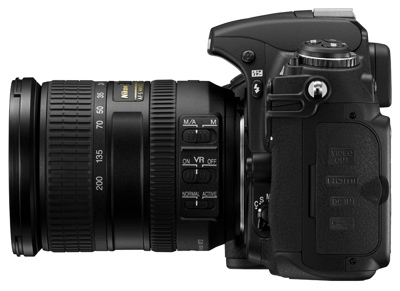
A camera lens is a camera lens, you might say, but fully knowing your gear and its functions is important. You will here be guided through the different parts and functions that a camera lens often have. The camera lens that is shown is:
Nikon AF-S DX 18-200mm f/3,5-5,6 G IF-ED VR
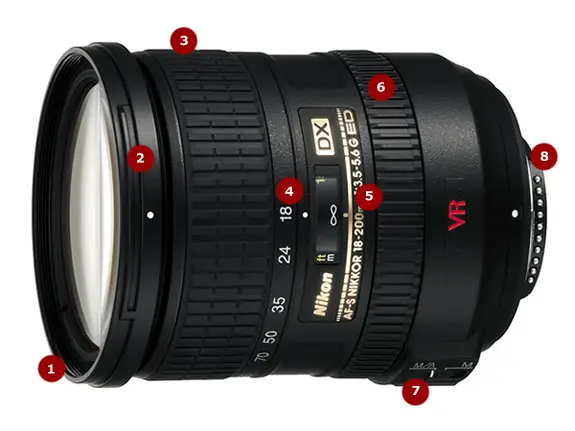
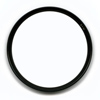
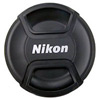
1. Filter thread and front lens cap
This is the thread where you screw on and attach your filters, such as UV- and polarizers. This particular camera lens has a filter thread with a diameter of 72 mm and it needs a filter with the same dimensions. If the filter is screwed on and attached to the lens, the front lens cap will be mounted onto the filter instead of the lens. The front lens cap protects your lens (and filter) during transport and storage, and should always be mounted when you are not using the lens. Even the front lens caps have dimensions that match the lens filter diameter. If you lose your front lens cap you must look at the filter diameter before ordering a replacement. In this case, 72 mm is yet again the diameter to look for.
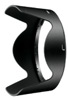
2. Lens hood mount
Along with this lens, there comes a lens hood named HB-35. This lens hood is made of plastic and protects your lens, not only from incoming stray light but also from bumps and dirt that may get in your way when you are shooting.
The white point just below our red dot (see # 2 above) is a marker and a similar marker can be found on the lens hood. These markings indicate where the mounting and attaching of the lens hood should start.
3. Zoom ring
With this ring you choose your desired focal range. This specific lens has a focal range between 18 and 200 mm.
4. Zoom index
The white dot, here displayed right of the 18 mark, is the zoom index and tells you your currently chosen focal length. Turn the zoom ring so the marked zoom index matches your desired focal length.
5. Distance scale window and product name
In the small window on the lens (not available on all lenses) a distance scale is displayed, illustrating the distance to where the lens is focusing (shown in meters and/or feet). In connection with this distance scale is this also read the lens product name.
6. Focus ring
If you want to use manual focus, this ring is where you adjust the desired focal point. Today most lenses and photographers only use autofocus, where all the focusing is being made when pressing the shutter button halfway, and with the autofocus motor, but there is still a great use for manual focusing and the focus ring, for example when shooting macro photography.
7. Autofocus and Image stabilizer switch
This button allows you to choose from:
M / AF = AF (with the option to also adjust the focus manually)
M = Manual focus (manual focus only)
If you select AF you will focus using the camera and the Shutter/AF-button, but if you choose MF you will focus using the focus ring (see # 6). The same controls can sometimes be found on the camera body.
On this lens, there is also a built-in image stabilizer. This means that the lens can feel and avoid some of the movements you make when the picture is taken. On this lens, underneath the M / A switch, there are these switches:
On _VR_ Off
When put to ON the image stabilizer is turned on.
Put to OFF this feature is disabled.
Normal / Active
At Normal the lens so trying to avoid all movements except those that are similar to panning, that is moving the lens from side to side at the height of the subject. At Active the lens so trying to compensate for all movements both vertically and horizontally. The Active mode is because of this suitable for shooting from a bumpy car, boat or helicopter ride.
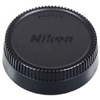
8. Lens mount and rear lens cap
Far-right in the illustration above you will find the lens mount. Where the lens mount you will also find all contact surfaces, for communication with the camera. Therefore this area mustn't be exposed to moisture or dust.
Different manufacturers use different lens mounts, with varying sizes and connectors, which means that we as camera lens buyer must purchase a lens that works with our specific camera. The same applies to the rear lens cap. If you lose your rear lens cap you must buy a rear lens cap for your camera brand. A rear lens cap for Canon does not work on Nikon lenses and vice versa.
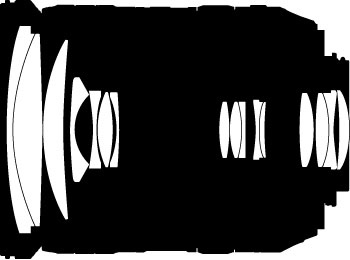
Inside the lens
What does a camera lens look like on the inside? Well, a camera lens is composed of a variety of glass bodies, called lens elements. Depending on the lens and lens type, the number of lens elements inside the lens may vary.
On the product page for this lens, here on Lensora, you can read that this lens is constructed of 16 lens elements divided into 12 groups. They are placed as follows, inside the lens: